Blog II Intro
Welcome to the second addition of my blog series where I’ll be covering the development of VisTag. Since my last post I’ve developed a working prototype. If your interested in the concept, check out my first blog post explaining it! You can find updates to the project on my GitHub
Working Prototype
Since the last blog post I have overhauled the application of the CLIP model, created a system to capture images in the viewport, and developed a straightforward output system.
Current Development
Goodbye ONNX
Previously I was using a version of the pre-trained CLIP model in the .onnx file format. This allows me to use the ONNX Inference node in Houdini, which (in-theory) makes feeding data in/out of the model easier. But this did not prove to be the case…
The unique file format and lack of documentation made deciphering the correct input tensors nearly impossible (for context: tensors are multi-dimensional arrays that hold the data you feed into a machine learning model—like images, text, or numbers—structured in a way the model understands). This made solving the Text Processing problem that I described in my previous blog post impossible to solve. So after banging my head against the wall I decided to instead try the door…
Hello Python
Running the CLIP Model in Python is a solved problem. By using the HuggingFace transformer Python library and with some help from a blog post, I was able to get it processing correctly. But now that I had it set up working with existing image files, how could I get it to process images of the meshes in the viewport?
Temp Flipbook Images
The best solution I could find to generate a usable image to feed to the model was through Houdini’s Flipbook function. Using a camera in the scene, some Python to toggle visibility flags and the tempfile utils library, I generated a script that creates a temporary image of the mesh in the viewport that can be used by the model. Once it is fed into the model and finishes processing the output, the temporary image is deleted.

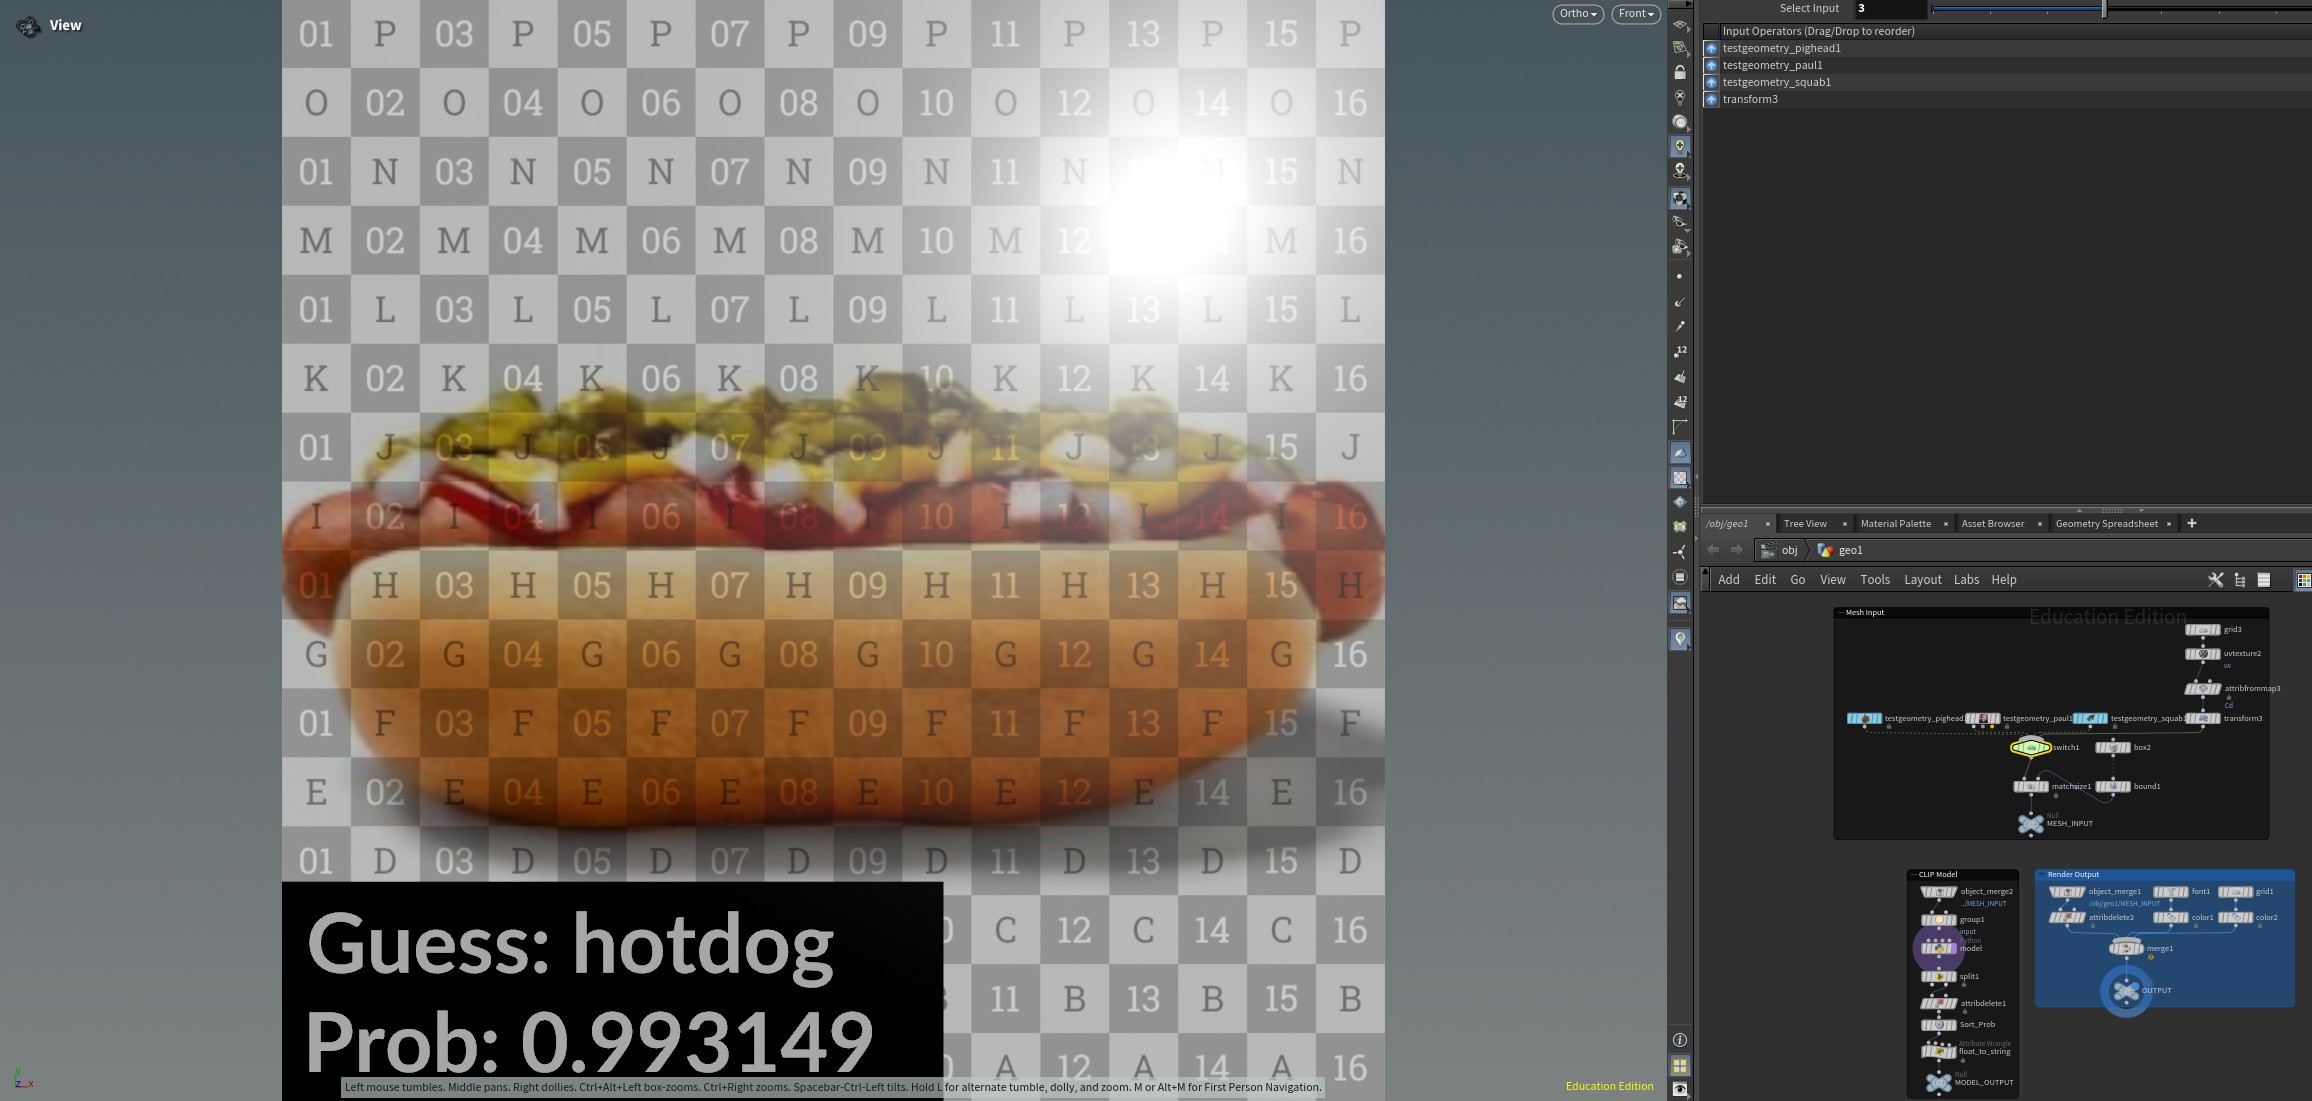
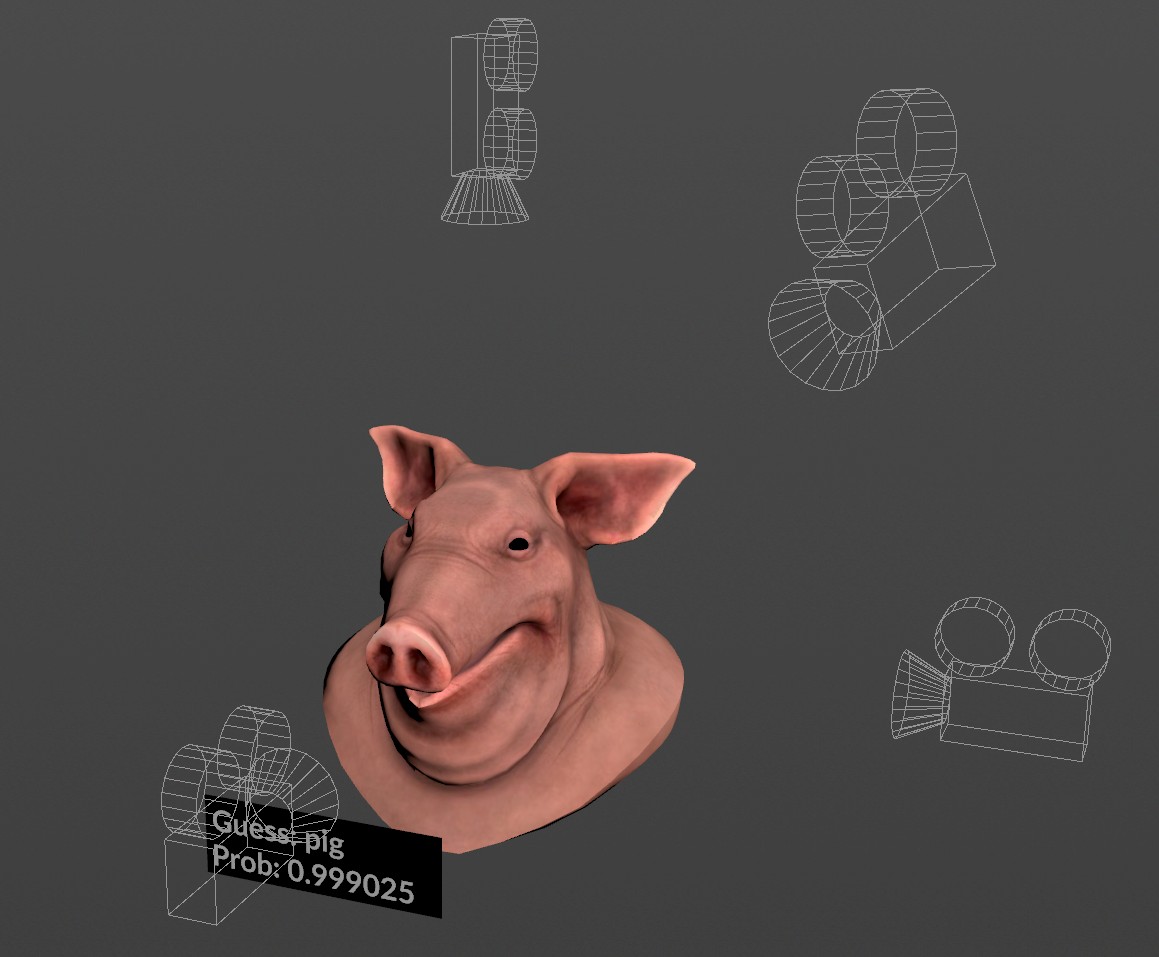
Model Output
The model outputs two arrays: the text inputs, and their probability. The best way to represent this in Houdini is by creating a point for each of these and assigning them as attributes. Once I have the points, I can use the Sort SOP node, and BOOM! I got my highest probability match! Since these are point attributes, I can reference them in other nodes, which is how I’m generating the text displayed in the bottom lefthand corner of the demo video.

Future Development
Multiple Cameras
One of the problems that I foresee with the system, as-is, is that it only works properly if the camera is viewing the model from an optimal angle. The easy way to reduce this dependency is by just increasing the amount of cameras in the scene.
What this will look like is a basic loop that iterates through the cameras in-scene, run the model, and keep the highest scores for each of them. I.e if from a front facing angle it is a 50% match, but from the top angle it is 95%, then I would keep the highest value from the top camera.
This allows for more flexibility regarding the type and setup of the meshes being fed into the system.
TOPs Network
Now that the VisTag system is working, I will create a TOPs network that will allow me to automate the process over all assets within a folder. The one problem that I forsee with this is the exporting of tagged meshes, as I have had some trouble with this in the past. Although this may be an operation that I can do in Python
Metadata to Unreal Collections
I wasn’t aware of the collections system in Unreal until a colleague mentioned it when I was describing this project to them. I’m familiar with the system of attaching Houdini attributes that can be read in Unreal, so I’m going to assume that there is a way to assign metadata that can be read as a collection in UE