This blog post will break down the Houdini section of the Grass generator. You will be able to see the construction of the meshes that are then animate using the Shader. I’ll also talk about the process and some problems I encountered throughout the project. Link to Portfolio Post here.

Overview
Construction
The construction of the meshes follows three main steps:
1.) The grass is created using a spline with four points. These points are then randomly jittered within an adjustable bound. A mesh single mesh is then swept along each spline. This ensures that each blade has the same number of tris and UVs. The user controls the number of blades created. Higher values will result in more natural looking grass.
2.) After a blade is created, they are then placed into a bunch. The user can control how many blades are put into a bunch and how many bunches are created. The number of blades within a bunch is randomly generated, but the maximum allowed can be changed.
3.) A point cloud is generated from a shape (either a square or circle) and points within it are jittered. Using Attribute Randomize and Noise nodes, their normals are randomized to change their scale, rotation, and angle. The bunches are then randomly placed on these points and their normals values change the scale, rotation, and angle of the bunches.

You have now generated a patch of grass using the blades, bunches, and point values you changed!

Optimization
Optimization is always a large part of any project that I do. Since the grass is polygon based, I had to ensure that it would not bog down the game when thousands of meshes are placed within the scene. My solution to this was to offer four different levels of detail for the generated mesh.
You can choose between four LODs:
LOD 1: 1 Tri per Blade
LOD 2: 5 Tri per Blade
LOD 3: 9 Tri per Blade
LOD 4: 19 Tri per Blade

During the creation of this tool Epic Games released Unreal 5.1. This enabled the ability to generate Nanite-enabled Foliage. There is an option within the Houdini tool to enable Nanite, so the user does not have to traverse each generated mesh to enable it.

Foliage Tool
Meshes generated using the Houdini tool can then be placed using Unreal Engine’s Foliage Brush. If using Unreal 5.1 you can also place Nanite-enabled Foliage.
Problems Encountered
This section of the project had far less problems than the Unreal portion. But there was still some hiccups when it came to development.
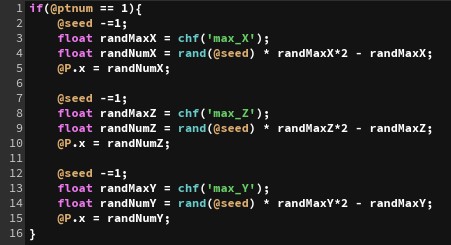
Randomization
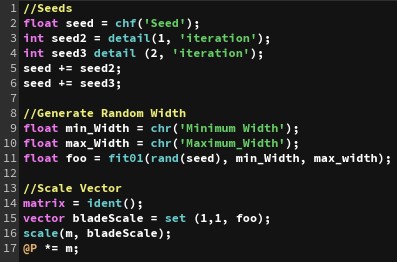
For the grass generation to be convincing I had to add elements of randomization. Since the project was using For-Loops for each process I had to change the seed each time the loop ran in order to get a different result. In order to do this, I utilized the loop meta data node. This node stored the loop iteration within a variable that I could access to change the seed for each iteration. I used this handy trick several times to give the grass the randomized look it needed.
Unreal Properties

Since this project is integrated within Unreal, being able to adjust the properties of the generated mesh is very important. I had to learn some new Houdini Engine attributes to get the desired effect. Solving this problem allows users to edit parameters of the mesh, only adjustable within Unreal Engine, in the same panel as the other parameters. Limiting time spent searching for specific features.
Node Graph
Green nodes represent the location of parameters that can be changed. Blue nodes are where Unreal Properties are assigned.
